Louisiana vs. Caddo Lake Photo Tours: What Sets Them Apart
Explore why Louisiana's cypress swamps might be the best-kept secret in nature photography.
Interested in photographing ancient cypress trees in peaceful, crowd-free swamps? Check out the Fall 2025 Tour Details or view the Fall Tour Gallery to see what's waiting for you in Louisiana.
Fewer Tours, More Unique Images
Caddo Lake is well known among photographers—and that’s part of the problem. There are pages and pages of tour companies offering workshops there, which means lots of overlap in imagery, access, and timing.
In contrast, Louisiana's cypress swamp tours—like mine—are few and far between. You won’t be jockeying for tripod space, and you won’t come home with the same images as everyone else. In fact, most people have never heard of places like Lake Dauterive or Lake Fausse Pointe—and that’s what makes them special.
"I have been to Caddo a number of times and found that LA has just as much if not better photography potential. Both areas depend on the weather conditions for those 'killer' images. I will stick with your tours." — James Saxon
Size and Separation: Louisiana vs. Caddo
| Feature | Lake Dauterive + Lake Fausse Pointe (LA) | Caddo Lake (TX/LA) |
|---|---|---|
| Combined Area | ~33,500 acres | ~25,400 acres |
| Connected System | Yes – narrow, seasonal channel | Single continuous lake |
| Navigability | Only at high water; often impassable | Generally accessible year-round |
| Traffic & Tours | Very limited; few operators | Dozens of tour companies |
| Image Overlap Risk | Low – highly original | High – frequently photographed views |
The combined area of Lake Dauterive and Lake Fausse Pointe is larger than Caddo Lake. Though technically connected, they're best treated as separate destinations. I’ve navigated the narrow channel between them on several long trips, but it’s very shallow—and unless the water is high, the passage can become impassable.
There are boat launches on both lakes. It’s wise to pick one and stay there for the day. If the wind shifts after you’ve crossed between them, you may not make it back.
This natural division means each basin offers a different light, a different rhythm, and a quieter photographic experience.
Wildlife, Atmosphere, and Culture
While both regions can produce stunning images, Louisiana’s Atchafalaya Basin brings a flavor all its own:
Ospreys, egrets, spoonbills, ibis, and herons nest here in spring
Fog, Spanish moss, and golden cypress dominate in fall
And there’s Louisiana food and culture waiting after the shoot
Caddo has cypress and mist. Louisiana offers that—and a deeper sense of place.
Final Thoughts
If you’re looking for the road less traveled—with more photographic potential and fewer people traveling it—Louisiana might just surprise you.
Take a look at the Fall 2025 Cypress Swamp Tour or browse the Fall Tour Gallery and start imagining what you could create out there.
Nikon Z8 Custom Settings Reference (Printable PDF)
Need help setting up your Z8? I offer one-on-one consulting for Nikon photographers.
I teach these techniques hands-on during my Louisiana Photo Tours. Small groups, real-world experience.
Z8 Custom Settings Reference Sheet Now Available
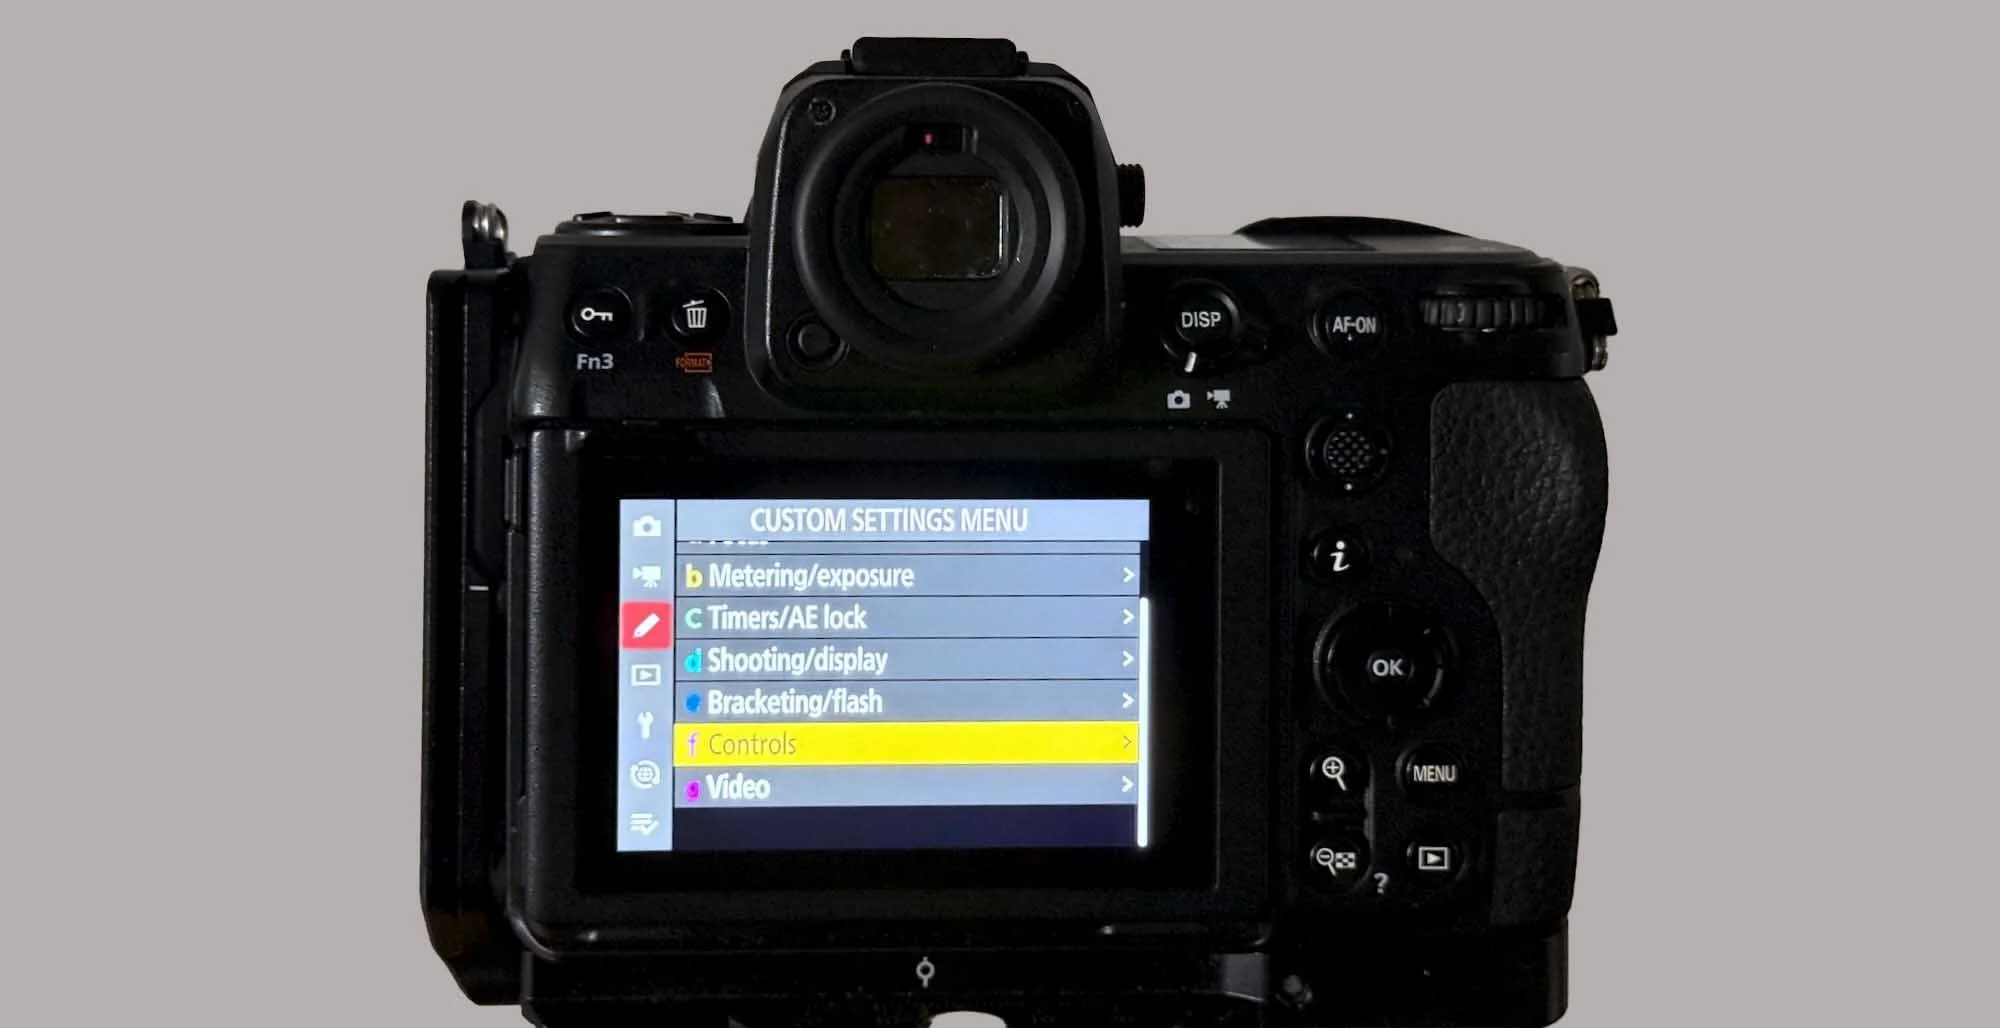
As part of my ongoing series on optimizing the Nikon Z8 for real-world use, I’ve created a complete printable reference to all available options in the Custom Settings Menu (a–g).
This is not just a list of what I change — it’s a fully organized layout of all configurable options across the Z8’s Custom Settings Menu. Each item is grouped by section (AF, Exposure, Display, Controls, etc.), with side-by-side columns to compare the Nikon ID (like “a6”) to your chosen settings. I designed this to be used alongside your camera in the field or at your desk — whether you’re resetting things after a firmware update, or building your own personalized configuration.
📝 What’s Inside the Download
Every item in the Custom Settings Menu (a1 to g22)
Clear organization by section (Autofocus, Controls, Display, etc.)
Columns for Nikon’s default ID, function name, and your custom setting
Landscape printable layout for easy annotation and review
Whether you’re copying my setup or building your own, this PDF helps you stay organized — and avoid digging through menus mid-shoot.
If you’re looking for the quick-start version of my setup (the few changes I recommend for most wildlife photographers), head over to this post for a full walkthrough and downloadable quick sheet.
📌 Coming Next: I’ll be testing and writing about the Focus Limiter feature on the Z8 — a powerful tool for avoiding missed focus due to foreground clutter. Stay tuned!
💬 Need Help Setting Up Your Z8?
I offer one-on-one consulting for Nikon Z8 setup, Lightroom workflow, backup strategies, and more.
Photograph Louisiana wildlife on small-group photo tours:
Spring Bird Photography Tours | Fall Cypress Swamp Photo Tours
If this Nikon Z8 guide helped you, please consider making a small donation to support future firmware testing, field updates, and in-depth setup tutorials.
Tips for Photographing in Fog and Backlit Mist
Why Fog and Mist Make Magical Images
One of my favorite times to photograph Louisiana’s swamps is when fog or mist blankets the water in the early morning. Whether it’s dense ground fog or soft, backlit mist hovering over the cypress knees, these conditions can transform an already beautiful scene into something moody, mysterious, and unforgettable.
As a nature photographer, I’m always watching the forecast for high humidity and still wind at dawn. That usually means fog. And when I’m lucky enough to get it—especially with some backlight—I know it’s time to make magic.
Benefits of Photographing in Fog
Even, Diffuse Lighting – Fog acts like a giant softbox, eliminating harsh shadows and creating smooth tonal transitions.
Simplified Backgrounds – Distant elements fade into white or gray, letting your subject stand out clearly.
Mood and Atmosphere – Even a familiar subject becomes poetic or otherworldly when veiled in mist.
Visual Focus – Fog reduces distractions and allows for more graphic, minimalist compositions.
Exposure Tips for Fog and Mist
Fog tends to fool your meter. It’s brighter than it looks, and automatic exposure modes often underexpose it. As a manual exposure shooter, I watch my histogram and expose to the right—but just barely.
For fog:
Slight overexposure often works best.
Avoid clipping highlights if the sun starts breaking through.
Bracket when unsure; small exposure shifts can make a big difference.
For backlit mist:
Expect to underexpose slightly if the mist is catching direct sunlight.
Mist can go nearly white—adjust exposure accordingly to keep texture.
Use lens hoods or block stray light to reduce flare.
Foggy Conditions:
Think in black-and-white or monochrome tones. Color often takes a back seat.
Use strong shapes—trees, branches, reflections—to build structure.
Telephoto lenses compress the fog layers for a dreamy effect.
Try framing close subjects sharply with distant fog-blurred backgrounds.
Minimalism in Heavy Fog: A Monochrome Opportunity
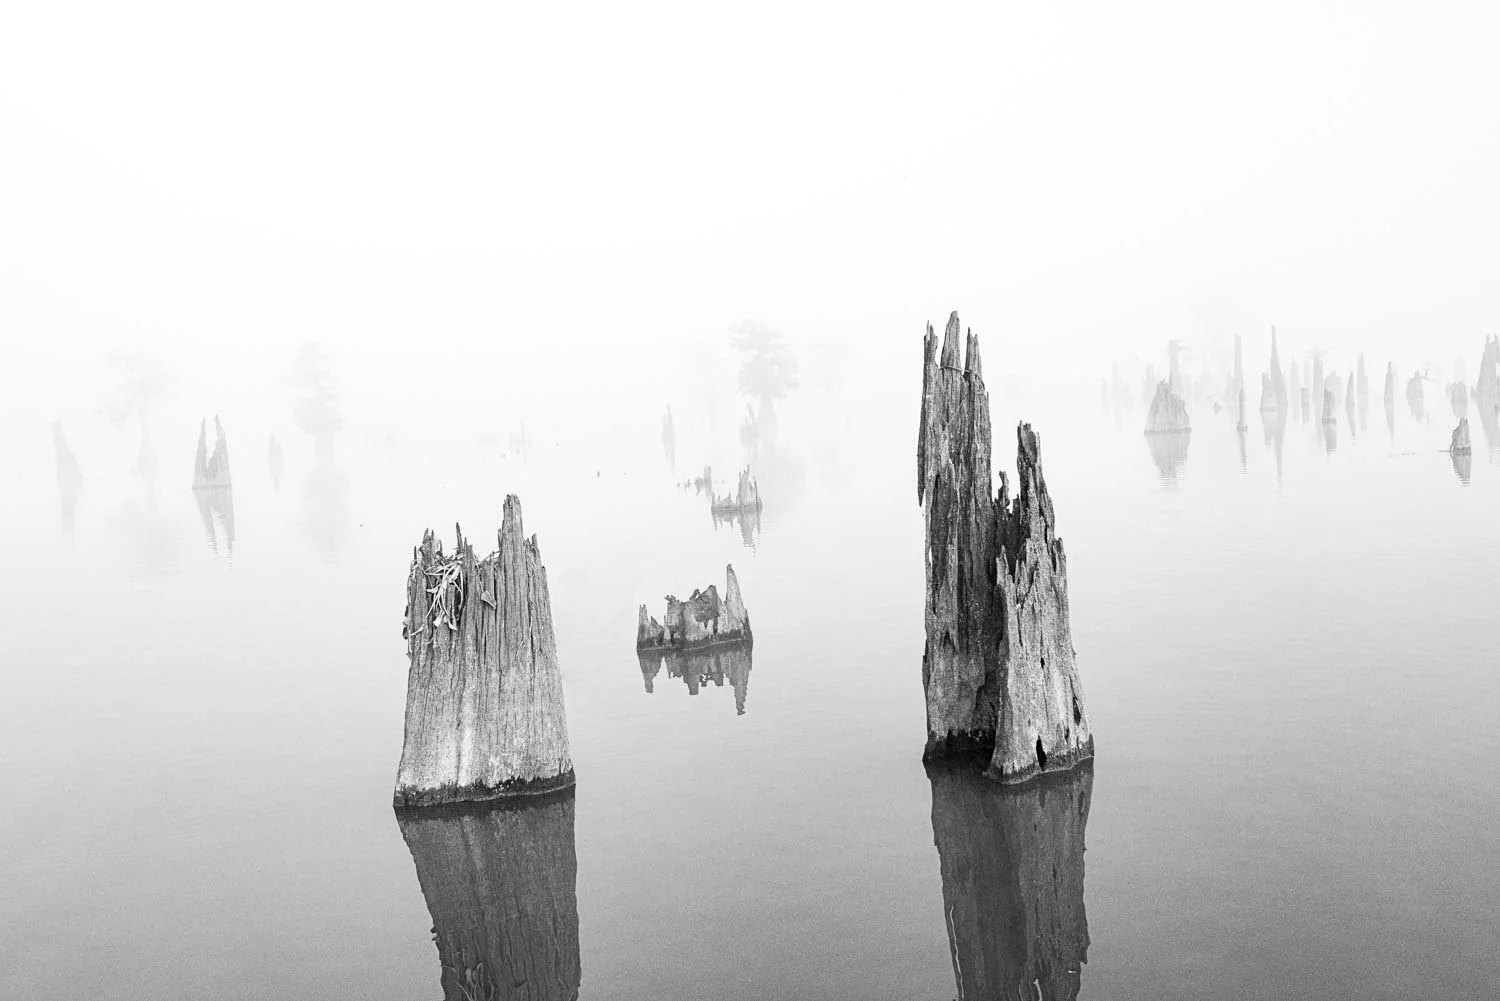
Ancient cypress stumps in dense fog, photographed near the boat launch with a 35mm lens.
On some mornings, the fog is so thick we can barely leave the launch. On this particular day, our boat captain carefully poled us through a field of cypress stumps—remnants from logging operations decades ago. The fog was so dense it obscured the far shore entirely, and we stayed close to the dock, working the scene in near silence.
This image was made with a 35mm lens, something rarely usable in open swamp scenes because of background clutter. But the fog rendered everything distant invisible, allowing me to use a wide focal length without distractions. There was color in the foreground stumps—rich browns and silvery grays—but I chose to process this as a black-and-white image to emphasize form, texture, and the eerie stillness of the moment.
These are the kinds of conditions that reward slowing down and seeing differently. You’re not chasing drama—you’re inviting quiet.
Backlit Mist:
Seek angles where the sunlight filters through mist.
Look for shafts of light, rim lighting, or glowing foliage.
Capture motion if the mist is drifting—longer exposures work well here.
A Real Morning on the Water: From Panoramic Glow to Golden Detail
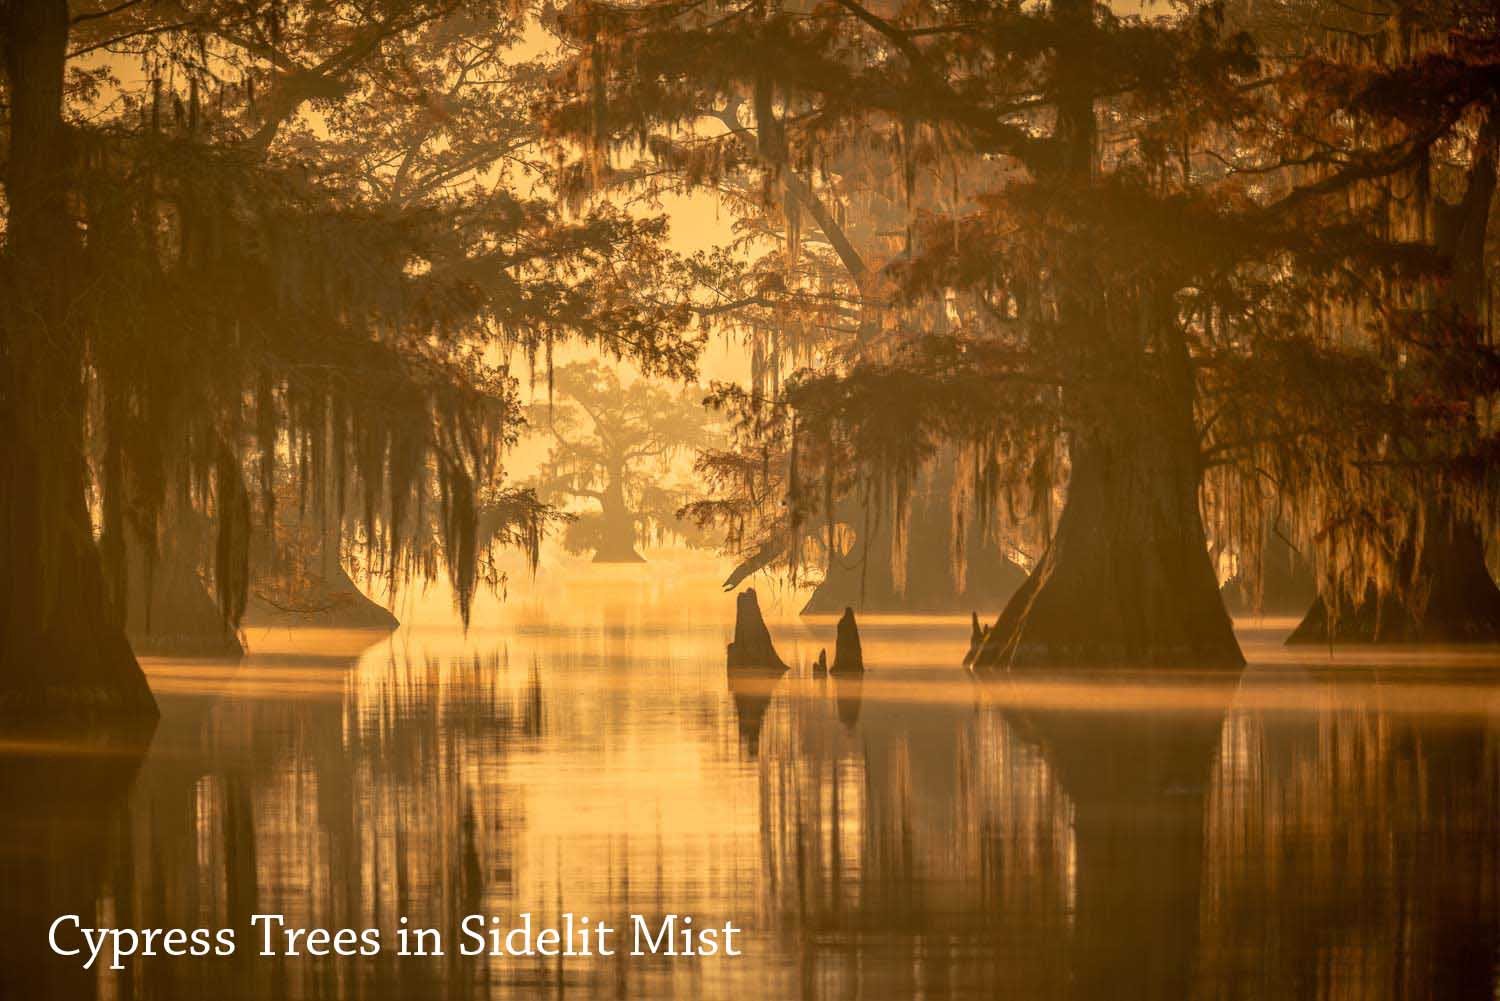
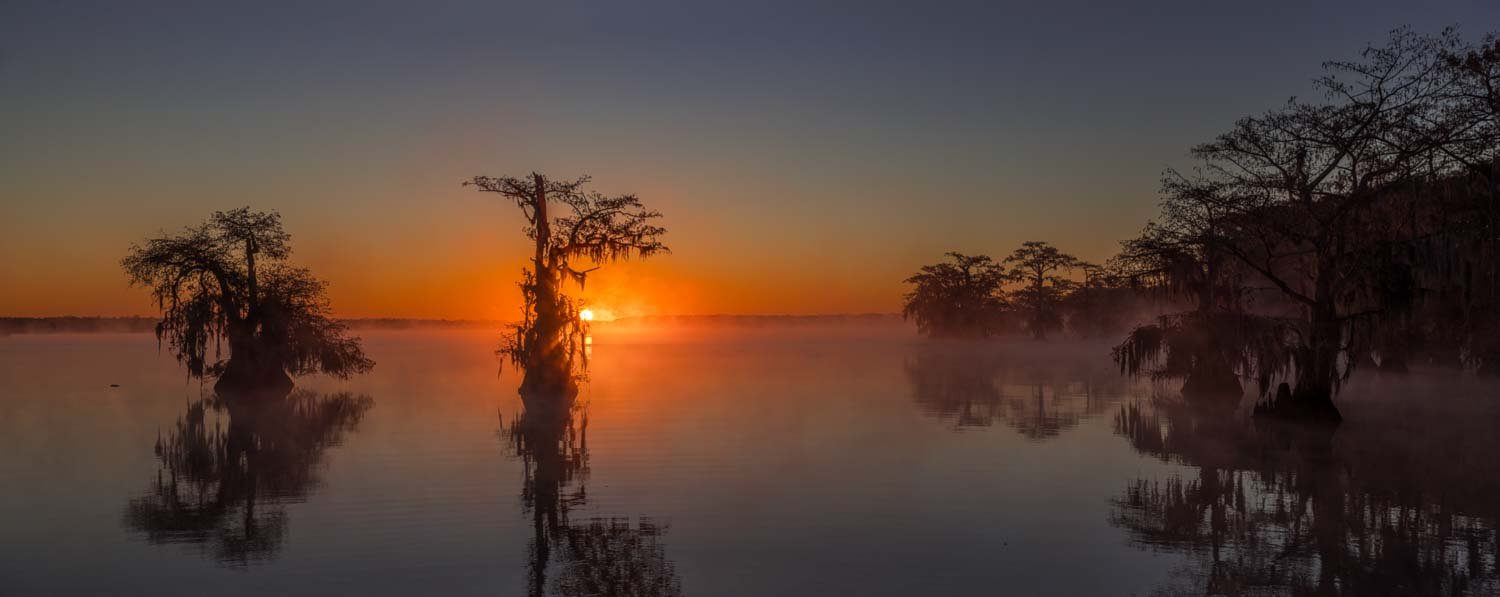
Backlit sunrise mist over the swamp, captured from the boat during a calm fall morning.
On one particularly still morning during a fall tour, we caught the sun rising through a blanket of mist. This panoramic view, taken directly from the boat just after sunrise, shows the mist glowing orange—backlit by the first light of day.
Just minutes later, we navigated toward the bank on the right side of that frame, where the morning sun began filtering through the moss-draped trees. The small, shallow-draft boat let us ease quietly into a narrow channel, giving us front-row seats to scenes like this:

Sunlit mist along the bank, minutes after the panoramic scene, accessed via a shallow channel.
These moments are fleeting. The mist burns off quickly, and you’ve got to be in the right place, at the right time—and able to get to that place. If this kind of access and light speaks to you, sign up for the Fall Cypress Swamp Tour and come experience it firsthand. That’s part of the magic of these swamp tours: they’re built for exactly this kind of light, atmosphere, and access.
Focus and Lens Choice
Manual focus may help if your autofocus struggles in low contrast.
Focus on foreground elements, especially if the background fades into mist.
A telephoto zoom (e.g., 100–400mm) lets you isolate key elements and compress the depth.
Final Thoughts
Photographing in fog and backlit mist takes some planning, a bit of luck, and a willingness to adapt. I’ve returned to the same spots over and over, waiting for the right mix of humidity, wind, and light. When it all comes together, it’s magical.
The next time the forecast calls for fog, grab your gear and head out early. You might come home with your most atmospheric and memorable images yet.
🍂 Ready to chase the mist with me this fall? Reserve your spot on the Fall Cypress Swamp Tour — space is limited and mornings like these don’t wait.
If you found value in this post, please consider making a donation to help me continue publishing guides and field notes like this.