Charles Bush Charles Bush

Charles Bush Photography January 2025 Newsletter

Join Charles Bush Photography’s Fall and Spring Photo Tours in 2025 to capture Louisiana’s stunning landscapes—vibrant cypress trees, lush spring greenery, and dynamic wildlife. These tours are perfect for refining your skills and creating unforgettable images.

View the Best Photos of 2024 for inspiration, and explore our newly updated website for tour details and easy navigation. Sign up today to elevate your photography!

Fall Photo Tours

Black and White Swampscene taken at Lake Martin in November 2023

I am excited to announce three new Louisiana Fall Photo Tours for 2025:

  • November 2nd – 5th, 2025

  • November 16th – 19th, 2025

  • December 1st – 4th, 2025

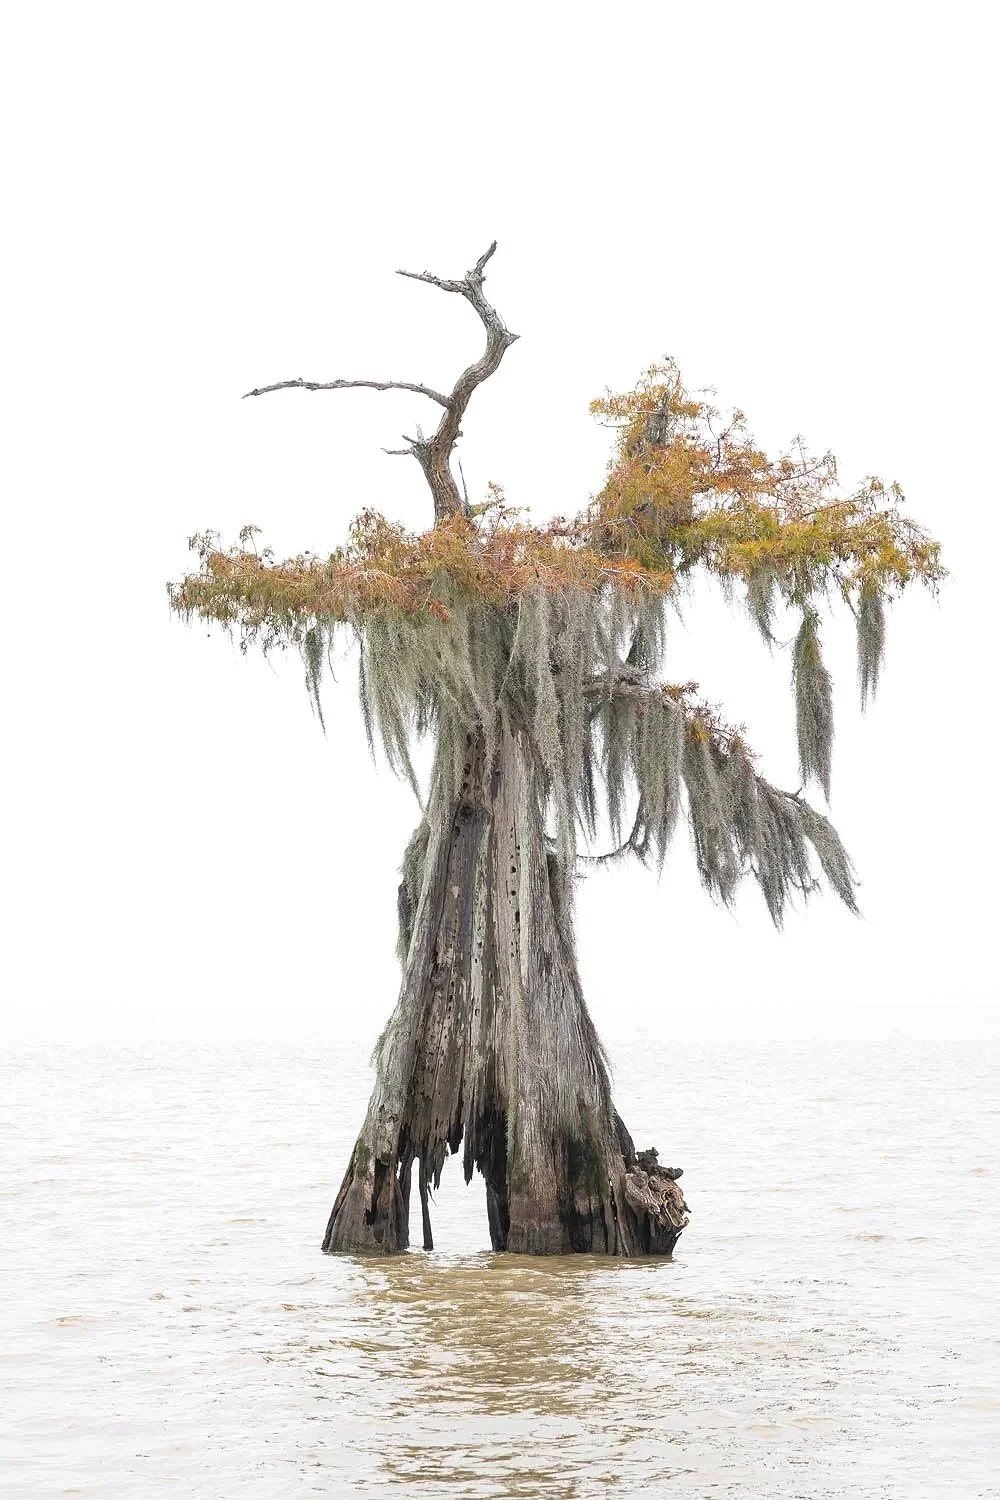
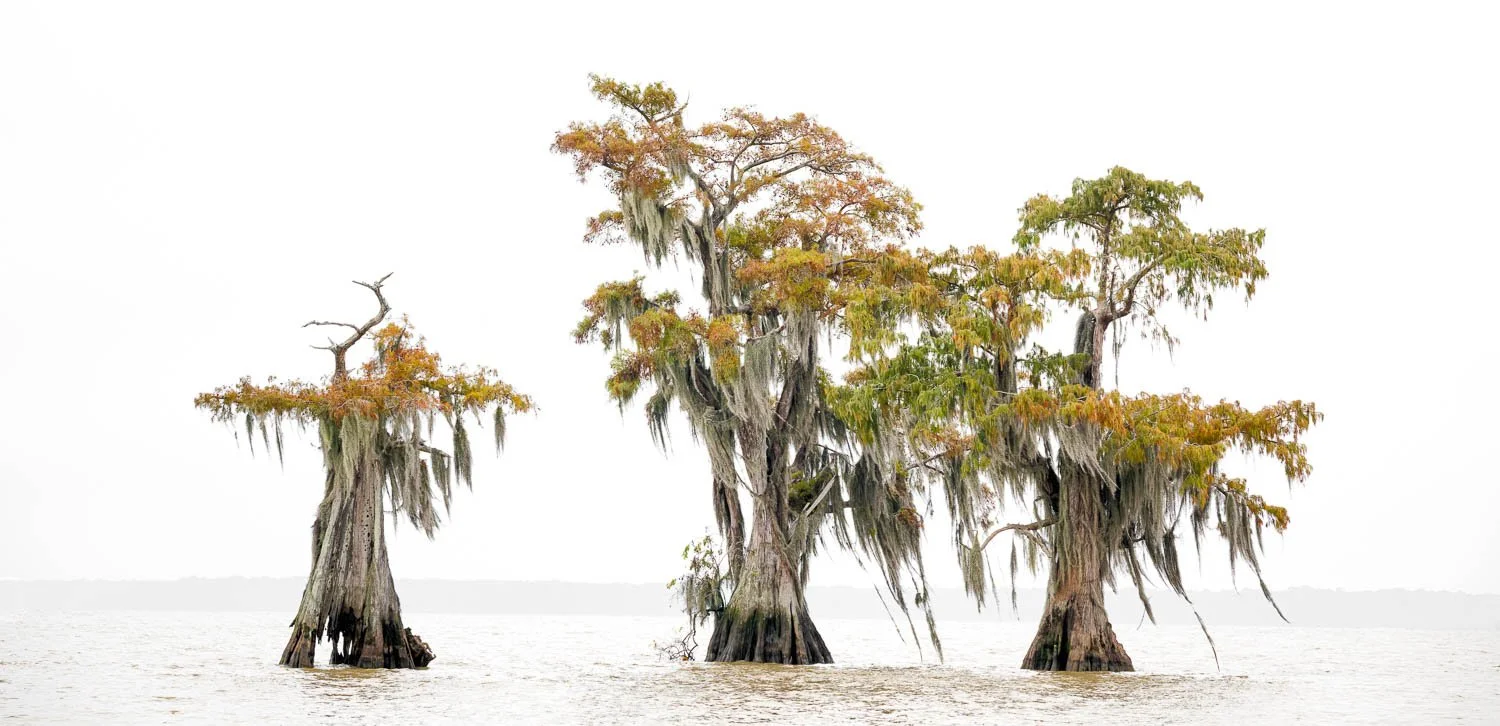
These tours provide a unique opportunity to capture the beauty of old-growth cypress trees, some of the few remaining stands in Louisiana. Scheduled to coincide with peak fall foliage and optimal lighting conditions, you will have the chance to photograph these majestic trees reflected in the still waters of Louisiana’s swamps. These photo sessions will focus on perfecting your compositions and capturing the intricate details of Spanish moss, vibrant cypress leaves, and mirror-like reflections.

Join us to explore the heart of Louisiana's natural beauty and elevate your photography.

Learn more and sign up for the Fall Photo Tours

Spring Photo Tours

Great Egret Courtship Behavior

Great Egret Courtship Behavior Taken at PJF Farms in April 2024

There is still availability for the 2025 Louisiana Spring Photo Tours:

  • April 13th – 16th, 2025

  • May 11th – 14th, 2025

  • May 25th – 28th, 2025

Springtime in Louisiana offers a photographer’s paradise with nesting wading birds, osprey in flight, and the lush greens of new growth. These tours are designed to get you up close to the action, providing stunning opportunities to capture intimate wildlife moments and dynamic bird behavior. Learn how to frame your shots to highlight the vibrant ecosystem and create images that tell a story.

Reserve your spot today and experience the magic of Louisiana in spring.

My Best Photos of 2024

Look at my curated gallery of the Best Photos of 2024, showcasing some of the most memorable moments captured during last year’s tours. From serene swamp reflections to striking bird portraits, these images demonstrate the kinds of stunning photographs you can create on one of my tours.

View the full gallery here.

Website Update

With the recent update from Squarespace 7.0 to 7.1, my website's look and functionality have changed. While I’ve worked diligently to restore the familiar layout and optimize for search engines, some aspects, like the gallery navigation, differ from the previous version. I’m continuously improving the site’s usability and ensuring the content remains accessible.

Please email me if you notice any errors or have feedback about the site. I greatly appreciate your input.

Read More
Charles Bush Charles Bush

Announcing Fall Cypress Photo Tours

Late fall in Louisiana brings excellent photo opportunities for photo tour participants in the swamps. Featured here are two Louisiana Photo Tours timed to provide the best chance for rust-colored cypress trees and misty or foggy mornings.

Lake Martin Fall Swamp Scene

I'm pleased to announce three photo tours scheduled for this fall! For early morning photography, it is difficult to predict the timing of peak fall color and mist and fog on the water. Still, these tours coincide with unique photo opportunities on tours over the past twenty years.

Late fall in Louisiana brings excellent photo opportunities for photo tour participants in the swamps. Featured here are three Louisiana Photo Tours timed to provide the best chance for rust-colored cypress trees and misty or foggy mornings. We visit three locations that offer access to large old-growth Bald Cypress trees growing from within the water. The tours are scheduled for the week before and the week after Thanksgiving. Louisiana boasts forty percent of North America's wetlands, and we'll visit the Atchafalaya Basin, North America's largest River swamp ecosystem. We finalize the itinerary for the tour as late as possible to ensure we are at the right place, depending upon the weather.

The tour is divided between time spent on the boat and photographing from the shore.s us to reach the prime shooting locations, primarily in the morning, weather permitting. When we photograph from the shore, we can use tripods, which allows us to use slower shutter speeds to our advantage.

The tours start at 3 p.m. on the first day and end after the last photo session on the fourth day, giving us three full days of photography.

Read More
Photo Tours, Photography Charles Bush Photo Tours, Photography Charles Bush

Charles Bush Photography Newsletter – December 2024

  • Spring Bird Photography Tours: Now open for booking! Explore Cazan Lake, Miller’s Lake, Jefferson Island, Lake Martin, and Henderson Swamp while capturing nesting birds like egrets, herons, Roseate Spoonbills, and Osprey in flight. Includes three half days by boat and three half days on land.

  • Fall Tour Highlights: 2024 season concluded with spectacular imagery of autumn cypress trees. View the best photos in our gallery. 2025 dates to be announced soon.

  • Tool Updates: Insights from using Fast Raw Viewer and Photo Mechanic during fall tours. Detailed comparison coming soon.

  • Backup Strategies: Guidance for Apple users on the latest options for protecting your photo files. Blog post coming soon.

Thinking of Spring

Roseate Spoonbill at Rip's Rookery Jefferson Island

Roseate Spoonbill at Rip’s Rookery Jefferson Island

As the year winds down, it’s the perfect time to start planning for spring! Our Spring Bird Photography Tours are designed to capture the stunning nesting wading birds of Southern Louisiana. You’ll have the opportunity to photograph majestic egrets, herons, ibis, the vibrant Roseate Spoonbills, and Osprey in flight in their natural habitats.

Tour Highlights:

  • Locations: Cazan Lake, Miller’s Lake, Jefferson Island, Lake Martin, and Henderson Swamp.

  • Structure: Three half days by boat and three half days on land to ensure a diverse range of photographic opportunities.

Learn more and book your spot today—limited availability for this unforgettable experience!

Great Egret Courtship–Cazan Lake

2024 Fall Tours Completed

Lake Martin early morning

Thank you to everyone who joined us for this year’s fall tours! The stunning cypress trees with their fiery autumn hues and the golden-hour reflections made for some incredible images.

Want to see the best shots from this season? Click here to view the gallery.

Looking ahead, the 2025 Fall Tour Dates will be announced soon. Stay tuned for updates in early 2025 and be ready to reserve your spot.

Sunrise at Lake Dauterive

Photo Mechanic / Fast Raw Viewer Update

I’ve put Fast Raw Viewer and Photo Mechanic through their paces this fall during the tours. Here’s a quick update:

  • Fast Raw Viewer: A fantastic tool for quickly checking exposure and sharpness, making it an essential part of my workflow. But it won’t replace Photo Mechanic as the import and keywording tools are lacking.

  • Photo Mechanic: Still my go-to for downloading and keywording images efficiently.

I’ll publish a detailed comparison soon, including insights from real-world use on the fall tours. Watch out for this on the blog!

Photo Computer Backup Strategies

Backup strategies are a hot topic, especially as we handle ever-larger files. I’ve been working closely with a client to develop a robust backup system tailored to photographers, particularly those using Apple computers.

New options, including improved cloud integrations and hardware setups, are making it easier to protect your images. I’ll be sharing these insights in an upcoming blog post to help you create a backup plan that works for you.

Stay Connected

Thank you for being part of the Charles Bush Photography community. As always, your passion for capturing the beauty of nature inspires everything we do. If you have questions about tours, tools, or techniques, don’t hesitate to reach out.

Happy holidays, and here’s to another year of extraordinary photography!

Warm regards,
Charles Bush

Read More
Charles Bush Charles Bush

Charles Bush Photoraphy November 17–20 Photo Tour Trip Report

With a fantastic group of participants, I had the pleasure of leading a memorable trip into the swamps of Southwestern Louisiana. During our journey, we explored three stunning cypress swamps: Lake Dauterive, Lake Martin, and Lake Fausse Pointe. Despite facing high winds and a day of intermittent rain, we returned with some incredible photographs that truly captured the beauty of the region.

With a fantastic group of participants, I had the pleasure of leading a memorable trip into the swamps of Southwestern Louisiana. During our journey, we explored three stunning cypress swamps: Lake Dauterive, Lake Martin, and Lake Fausse Pointe. Despite facing high winds and a day of intermittent rain, we returned with some incredible photographs that truly captured the beauty of the region.

Having led tours to Lake Dauterive and Lake Martin for many years, I’ve learned the best spots to visit and how to navigate around choppy water. However, the winds during this trip presented some unique challenges. Lake Martinturned out to be the most accommodating, with its numerous sheltered areas providing respite from the gusts.

This was my first year including Lake Fausse Pointe, and it proved to be a fantastic addition to the itinerary. Its serene beauty and photographic opportunities make it a place I look forward to visiting again.

If you’re passionate about capturing the magic of Louisiana’s swamps, consider joining us for one of the spring tours. I’ll also announce next year’s fall tour dates soon—don’t miss out! Check them out here.

Check out a gallery of images for this trip and the preceding one here.

Read More
Charles Bush Charles Bush

Updated Guide to Photographing the Roseate Spoonbill in Louisiana

This is an update to a post made in 2013, considering changes to the locations where these beautiful birds can be photographed. Shots at the primary locations taken this year, 2024, are included. I suggest also reading the article written in 2013, which can be found here.

Roseate Spoonbill in Flight at Cazan Lake 2019

Best Locations to Photograph Roseate Spoonbills in Louisiana

Lake Martin

Lake Martin's Rookery hasn't returned to its pre-2006 status. While it still exists, it's not within photographic range, and only an occasional Roseate Spoonbill can be seen, usually high overhead.

Rip Van Winkle Gardens - Jefferson Island

Roseate Spoonbill Bathing at Rip's Rookery in May, 2024

The Rookery entrance is now along the main road into the Gardens, named Rip's Rookery. Previously, the best photography was at a small pond on the West side of the complex, but erosion has mostly submerged the Cypress Trees island. While a few birds, including Roseate Spoonbills, still nest there, their numbers have decreased. The best photography spot is now at the larger pond, requiring a longer lens for close shots. Flight shots can be captured with a shorter telephoto lens, but shots in the trees need at least a 600mm lens, preferably with a teleconverter. The afternoon is the best time to photograph, as the East Side of the pond is far from the nesting birds. This year was worth visiting, but it's not what it once was. Their web site can be seen here.

Talons Landing Road

Recent visits haven't yielded any birds.

Miller's Lake

Roseate Spoonbill in Flight at Miller's Lake, taken in April, 2024

Roseate Spoonbill in Flight at Miller's Lake, taken in April, 2024

In recent years, Miller's Lake has offered better opportunities to photograph Roseate Spoonbills. We've used a boat with an outboard motor to reach birds in the trees, though the shallow lake makes boating challenging.

Cazan Lake at PJF Farms

Roseate Spoonbill taken at Cazan Lake in May of 2024

Roseate Spoonbill taken at Cazan Lake in May of 2024

Years ago, photographing Roseate Spoonbills at Cazan Lake required navigating a muddy road and hiking about a mile for limited access. Now, the access road is gravel, and the birds nest in a more accessible area, allowing for roadside photography. The best time to photograph is early morning. Note that boats are not allowed in the nesting bird area to protect them during nesting season. Acess to Cazan Lake is by pass, either a single day pass, or an annual pass. The Web site for the Rookery is here.

Miller's Lake and Cazan Lake are close to each other, making it ideal to photograph Cazan Lake in the morning and Miller's Lake in the afternoon.

Please consider joining us in the spring of 2025 to photograph this beautiful bird. I've been leading tours to photograph the Roseate Spoonbill since 2003 and know when and where to go. Check it out here.

Read More
Charles Bush Charles Bush

Computer Failure–Back-up and Contingency Planning

OK, my M1 Mac Studio failed in late October. Fortunately, the computer was over a year old under Apple Care. It seems that the internal SSD failed, and the machine would not boot up. I went through the standard troubleshooting procedures with no luck. I then called Apple, and they had me repeat all the steps I had already done with again no luck. They suggested I take it to the Apple Store, which I did the following day. The Apple Genius repeated the same steps with the same results. He stated it needed a new Logic Board, which he placed on order. The estimated time to repair was three business days.

Computer Gremlins are Lurking

OK, my M1 Mac Studio failed in late October. Fortunately, the computer was over a year old under Apple Care. It seems that the internal SSD failed, and the machine would not boot up. I went through the standard troubleshooting procedures with no luck. I then called Apple, and they had me repeat all the steps I had already done with again no luck. They suggested I take it to the Apple Store, which I did the following day. The Apple Genius repeated the same steps with the same results. He stated it needed a new Logic Board, which he placed on order. The estimated time to repair was three business days.

Fortunately, I have an extensive backup plan, and all my important files are on external drives, backed up in multiple ways. The backup plan is to use my M1 Macbook Air computer with the same external hard drives. The plan worked. However, the amount of RAM was marginal, and working meant closing any unused applications. For example, round-tripping from Lightroom to Photoshop and invoking one of the Topaz applications would not work. I had to export the file from Lightroom, close Lightroom, work in Photoshop, save the file, close Photoshop, and reimport the file into Lightroom. This procedure is acceptable for a few days, but a prolonged outage would be impractical.

Meanwhile, the Logic Board was not readily available. I ordered the original machine with a custom configuration with 32 GB of RAM and a 1 TB SSD. The logic board was not in stock locally or at any other Apple store. Delivery of the part was at least six weeks. Apple offered a replacement machine, but it was the stock Mac Studio Max, which only had a 512 GByte SSD, smaller than I required. After some give and take with Apple and with the assistance of a cooperative Lead Apple Genius and the local Store Manager, Apple replaced the machine with an M2 Mac Studio Ultra with 64 GBytes of RAM and 1TB, a better machine than the original, but it was nearly a month later.

I love my Mac Studio, both the replaced and the new one. But there are some lessons learned here:

  1. Apple Care is now a must-have. Self-repair is not an option. I have a significant amount of computer maintenance experience, and it is not an option to self-maintain these machines. For example, a failure of the SSD requires the replacement of the logic board, not simply the SSD. The whole machine frequently needs to be replaced.

  2. A computer disaster recovery plan is essential. You need to know how to keep working in the event of a failure. Data backup is crucial; storage should be on external drives, not the computer's internal drive. Fortunately, I did this well.

  3. Consider using the standard configuration computer rather than a build-to-order computer. The long recovery time of the computer was due to the non-standard configuration.

  4. It would help if you planned for an extended outage, ensuring you have a backup with enough power to work effectively. I purchased a new laptop in addition to the MacBook Air, with a larger RAM and fast processor. I kept the MacBook Air in case that laptop failed, as I needed the laptop computer to download images on the road, so I also needed a backup laptop.

  5. Ensure you have a list of serial numbers and web addresses for all your mission-critical applications. While the laptop computer had everything up and running, I needed to find some of the serial numbers when loading up the new computer.

The new Apple Machines with Apple Silicon are amazing computers. They are fast and reliable. However, the closed nature of the hardware makes repair nearly impossible except by Apple or one of the authorized repair shops. Fortunately, the computers are reliable, but failures do occur. Planning to ensure you can still work and not lose critical images is essential.

Read More
Charles Bush Charles Bush

Charles Bush Photography November 12-16 Photo Tour

The November 12th photo tour yielded many fine images in spite of less than cooperative weather. Arriving early, several of us photographed along the road at Lake Martin. The soft subtle light, which we had throughout the trip, yielded some nice low-contrast images. Sunday evening and Tuesday morning we visited Lake Martin by boat. At Lake Martin, we encountered nice fall colors and a variety of birds. Monday was spent editing images with rain all day. On the final day, Wednesday, we visited Lake Dauterive and we were rewarded with mist which was fantastic for creating high-key images.

Read More
Charles Bush Charles Bush

Planning a photo Shoot

I'm preparing for a photo shoot at Lake Dauterive for my next two photo tours. While visiting several locations, this paper will explore the thought process for Lake Dauterive; it is the site where I photograph my favorite Louisiana Fall images. Thought processes for the other locations are similar. I want to share my planning and thought processes during the trip to ensure everything goes smoothly and I and the other photographers return with stunning images. Even if you’re visiting this site or any other, the thought process for a photo trip is similar.

Early morning mist at Lake Dauterive

Early Morning Mist at Lake Dauterive

I'm preparing for a photo shoot at Lake Dauterive for my next two photo tours. While visiting several locations, this paper will explore the thought process for Lake Dauterive; it is the site where I photograph my favorite Louisiana Fall images. Thought processes for the other locations are similar. I want to share my planning and thought processes during the trip to ensure everything goes smoothly and I and the other photographers return with stunning images. Even if you’re visiting this site or any other, the thought process for a photo trip is similar. Here's what I'll be considering:

1. My goals for the shoot, specifically the types of images I want to capture.

2. The best time of year and time of day for the shoot.

3. Hotel accommodations and nearby restaurants.

4. The equipment and clothing I'll need to bring.

5. Useful apps to help with planning, such as weather and climate forecasts and moon and sun information.

6. Departure time to arrive at the photo site to capture the desired images.

7. Safety considerations and concerns.


Cypress Trees in Haavy Fog at Lake Dauterive

Cypress Trees in Haavy Fog at Lake Dauterive

Background

Lake Dauterive, located in the Atchafalaya Basin, is a shallow lake with large, old-growth cypress trees. I want the trips during the fall season when the cypress trees are in their burnt orange foliage. This typically occurs during the last three weeks of November and the first week of December, though it is difficult to predict precisely. I have scheduled the trips for the weeks before and after to avoid the Thanksgiving holiday week. The first trip will start on a Sunday, while the second trip will begin on a Monday to avoid travel on the Sunday after Thanksgiving. Other people making a similar trip visit an interconnected Lake, Lake Fausse Pointe. Those trips use Kayaks to access the large trees; I prefer motorboats. There is far better access for powered boats from the landing at Lake Dauterive. While kayaks provide a lower point of view and an individual experience, motorboats make photography easier and allow rapid access to different parts of the lake to maximize opportunities.

Cypress Knees and Trunks at Lake Dauterive

Cypress Knees and Trunks at Lake Dauterive

Ideal photographs from Lake Dauterive have either heavy fog obscuring the background with trees in silhouette or backlit mist producing an orange cast around the trees. Both mist and fog happen during the late fall and early winter. Heavy fog occurs when the temperature is below the dew point, and there’s a light breeze. Mist occurs when the air temperature is lower than the water temperature and there is little or no wind. Both of these situations happen primarily early in the morning. The period with peak autumn color coincides nicely with the potential for fog or mist.

Sunrise at Lake Dauterive

When taking sunrise photos, I prefer to have a tree or a group of trees in the foreground, creating a silhouette against the sun. After that, I shift to a spot that highlights the presence of mist or fog. To enhance the mist or fog effect, I use a telephoto lens that compresses the scene and intensifies the effect. Although achieving the ideal is not always possible, excellent photographs can still be captured on days with bright sunlight or even overcast windy days.

The weather in November in Southern Louisiana is unpredictable. Morning temperatures may be in the low thirties or the low seventies. Highs may be as low as the fifties to as high as the eighties; I must be prepared for all the above.

A Cold Windy Morning at Lake Dauterive

A Cold Windy Morning at Lake Dauterive

Here is a list of shots to capture:

1. Take a picture of the sunrise, with a tree silhouette in the foreground and the sunrise in the background.

2. Capture a panoramic photo of the sunrise, with a group of trees in silhouette in the foreground and the sunrise in the background.

3. Photograph cypress trees in backlit mist.

4. Take a picture of a cypress tree or trees with heavy fog obscuring the background.

5. Capture a photo of a cypress tree in fall colors, with a bright blue sky in the background.

6. Photograph cypress trees in choppy water.

7. Take an infrared shot of a cypress tree with a dark sky and water.

8. Capture reflections of fall colors in the water.

9. Take a closeup shot of a cypress leaves in fall color.

10. Capture shots of fall colors with intentional camera movement.

11. Photograph birds and wildlife.

12. Make close-up shots of swamp colors.

The top priority for Lake Dauterive is the backlit mist photographs and fog photographs.

Color Foliage at Lake Dauterive

Before the Trip

When planning a trip, my first task is securing a hotel reservation. I have been staying at a hotel in Henderson, Louisiana, for years despite it being an hour away from Lake Dauterive. The hotel’s location allows me to access other places I photograph during the trip. Additionally, there are only a few hotels near the lake, and the closest one is 30 minutes away via a poorly maintained road. To minimize costs, I always book in advance. If I were to visit an area I have not previously traveled to, I would research nearby hotels and their proximity to essential amenities such as restaurants, gas stations, etc.

Before embarking on my trip, I will inspect my vehicle thoroughly since I’ll be driving a long distance for the shoot. As the trip date approaches, I will closely watch the weather forecast and compile a list of the necessary clothing and equipment. The morning temperatures can be quite low, often hovering near freezing, and since we’ll be on an open boat, the wind chill can make it feel even colder. Therefore, I’ll likely need to pack a heavy coat, thermal underwear, warm socks, and boots. I’ve also added battery-powered hand warmers to my list to keep me warm and cozy throughout the trip

I have to leave for Lake Dauterive early in the morning to catch the blue hour, so I plan to pick up some food the day before for the boat. As I'm going on a tour, I must ensure I have enough breakfast for everyone joining me.

To prepare for the trip, I list all the equipment I must bring and pack it the day before. I also pack my clothes and have everything ready for the morning of my departure.

Shortly before I leave, I check the date and time in each camera body. Use Nikon’s Capture software to synchronize with the computer. I’m sure other manufacturers have similar software that allows you to do that. I also check the camera sensors for dust and clean equipment and lenses. I also test-fire the cameras and take photographs with each camera body and lens. I check that each lens will critically focus and produce sharp images. After I’m done, I reformat each camera memory card to ensure they are empty and working properly.

I check the computer and make sure the downloaded software, Lightroom and Photoshop, are up to date. I take some photographs and then download them onto the computer to ensure they work as expected. I reformat the disks to download the images and a backup and check to ensure they’re ready and perform any upgrades to the computer system to ensure it’s up to date. I set up the software to provide the proper keywording, copyright, and captions on an automated basis to ensure the process goes smoothly on the trip.

I preload each location, including Lake Dauterive and the hotel, into my GPS application on the phone. I preprogram all the phone numbers I need to contact other people on the trip (other photographers, boat operators, etc.) and the hotel so I don’t need to search for them on the road.

During the Trip

Lake Dauterive is the best location to capture the mist and fog shots I prioritize during the trip. Therefore, I closely watch the weather forecast to determine the best day to photograph there. I plan the morning departure time with enough leeway to ensure I arrive at the location in time for the best photographs. I use Carrot Weather on my iPhone to watch the conditions and then use the Clear Outside and Alpenglow to get a feel for the potential for mist or fog and the quality of the sunrise. I also determine what clothing to wear and the potential for rain or stormy weather.

Since I’m working in a small boat with other photographers, I try to bring minimal equipment. Tripods are not a good idea when working on a boat due to both size constraints and vibrations from the bottom of the boat are transmitted to the camera. I photograph with two camera bodies, one with my 24-85 lens and the other with my 70-300 lens. I rarely change lenses on the boat to minimize the risk of dust or water on the sensor. I find smaller lightweight lenses work better than the more professional heavy lenses on the boat. I use a dual camera strap to ensure the equipment stays safe.

After the shoot, I will download the images onto an external disk connected to the computer with the location, copyright, and common keywords included using Photo Mechanic. However, you could also use Lightroom to accomplish this. Finally, I backup the images onto a second drive for safety and import them into a Lightroom catalog.

While downloading the images, I check my equipment, clean lenses, and camera bodies, and prepare for the next session.

Equipment List

  1. Camera Bodies two D850’s one IR modified D800

  2. Nikon 24-85

  3. Nikon 70-300

  4. Nikon 500 f5.6

  5. Camera Strap

  6. Tripod and ball-head

  7. Nikon Manual focus lenses for IR (24mm, 50mm, 105mm)

  8. Remote Trigger

  9. ND filters

  10. Polarizing Filter

  11. Closeup diopter

  12. Lens cleaning wipes and microfiber cloths

  13. Hoodman loop

  14. Batteries

  15. Battery Charger

  16. Memory Cards

  17. Pelican Cases (large for normal photography and small for IR photography)

  18. Flashlights and Headlamp

  19. Blower Brush

Clothing List

  1. Heavy Coat

  2. Thermal Underwear

  3. Boots

  4. Winter Socks

  5. Wool Pullover

  6. Short and Long Sleeve Shirts

  7. Jeans

  8. Underwear

  9. Hat

  10. Gloves

  11. Hand Warmers

  12. Toilet Articles

Computer List

  1. Laptop

  2. Laptop charger

  3. Card Reader

  4. Thunderbolt Dock

  5. Image disk, backup disk

  6. Laptop drive backup

  7. Lightroom rated image disk

  8. Cables

Apps

  1. Carrot Weather

  2. Alpenglo

  3. Clear Outside

  4. Photo Pills

  5. Apple Maps

  6. Google Maps

Read More
Charles Bush Charles Bush

Lake Martin 2023 update

I previously wrote about Lake Martin's current situation. Many changes have occurred at the lake over the past few years. Firstly, the boat launch and several surrounding areas were inaccessible for over a year due to a property dispute. Although much of the dispute has been resolved, some places we could photograph are still restricted. Fortunately, the peninsula next to the launch we used to photograph sunsets, is now open again.

Great Egret from the boat at Lake Martin

I previously wrote about Lake Martin's current situation. Many changes have occurred at the lake over the past few years. Firstly, the boat launch and several surrounding areas were inaccessible for over a year due to a property dispute. Although much of the dispute has been resolved, some places we could photograph are still restricted. Fortunately, the peninsula next to the launch we used to photograph sunsets, is now open again.

Lake Martin Panoramic Sunset

Lake Martin Panoramic Sunset

Rookery Road is now closed on the south side of the lake. We can no lnnger drive to where the rookery is to check on the progress or diretly drive to teh visitors center. The visitors center is now only infrequently opened and the boardwalk is damaged and is not passible. The last time I could drive by the rookery, very few birds were visible.

During the spring tour we were unable to get any good photographs from the road. Next spring I don't plan on photographing there From the road.

Great Egret on a log at Lake Martin

Great Egret on a log at Lake Martin

Now for some good news! We have captured many great images from the spring and fall tours on the boat in the lake. We also took beautiful cypress scene photos during the fall tours.

So for now, look elsewhere during the sping if you're not in a boat. Photography from the boat is still exceptionaly good. Fall Cypress and susnet photograph is as good as ever.

So, photography from the road probably needs to be improved; look elsewhere. Photographing from a boat is very good and worth the trip. Fall Cypress Scenes and Sunsets are still good options.

Alligator on a log–Lake Martin

Alligator on a log–Lake Martin

Read More
Charles Bush Charles Bush

Images from this weeks photo tour

Here are a few images from this morning on our photo tour, enjoy.

Read More
Charles Bush Charles Bush

Making and Processing a Black and White Image–Part III

Part III of a series on making and processing a black and white image.

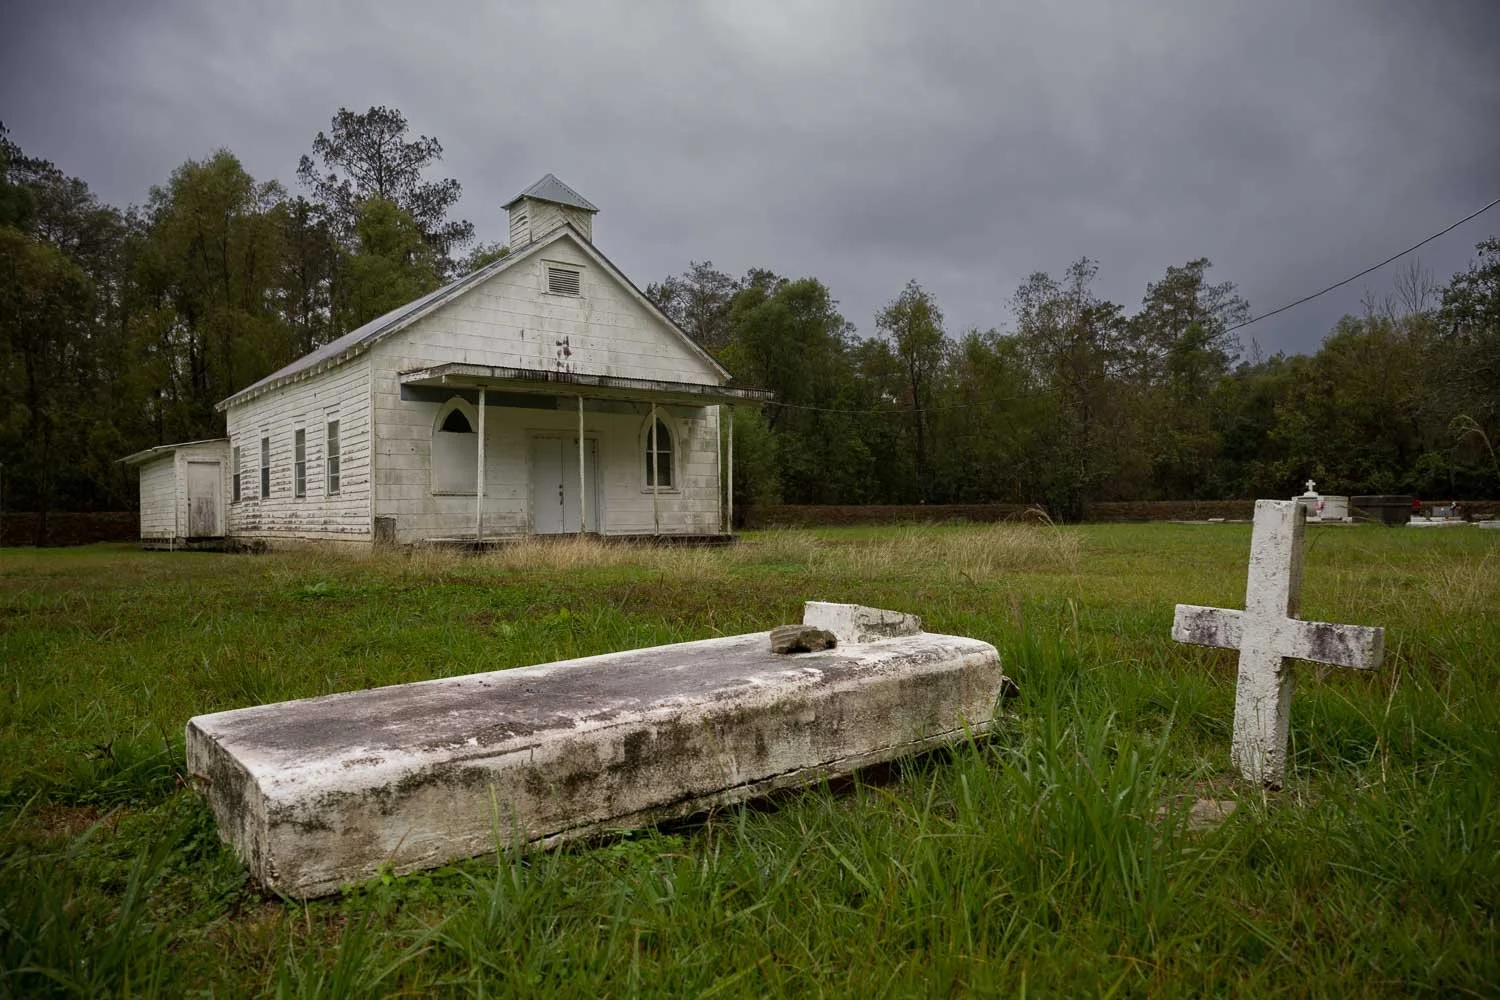
St Eloi Church Theriot, Louisiana

St Eloi Church Theriot, Louisiana

Image Processing

Once you've got a color image optimized for the conversion, the fun begins. I processed the image in three ways to determine the best approach. First, I used Lightroom's LUT-based method, viewing each of the LUT presets and picking the one closest to my vision which was B&W12. Below is a screenshot of the selection process.

The LUT is selected on the 4 box icon on the right side of the Lightroom window

The LUT is selected on the 4 box icon on the right side of the Lightroom window

Scroll through and view the options and pick the best choice

Scroll through and view the options and pick the best choice

This method has the advantage of allowing you to change the basic settings while viewing the black and white image. I was trying to optimize the sky for both contrast and the rays.

I also processed the image using Silver Efex Pro, producing a similar result. However, it was more tedious as I had to readjust the input file several times and reprocess it.

Finally, I used DXO Photolab 4 starting from scratch, using the raw file as the input. I was able to use Silver Efex Pro. I couldn't find a way to maintain the contrast in the sky with this method, but it may be possible to use some of the Nik Collection filters.

The best approach for me was Lightroom's LUT method. I found the key to the sky contrast was to adjust the Dehaze filter to my taste as I viewed the black and white image. The resulting image is below.

Processed Black and White Image

Processed Black and White Image

Next, I processed the brighter image, making it black and white using the same method and brightening the overall image, so the cross was very bright.

The image processed for a bright cross

The image processed for a bright cross

Then I loaded both images into photoshop as layers as shown below.

From Lightroom use the Edit it > Open as Layers in Photoshop Command

From Lightroom use the Edit it > Open as Layers in Photoshop Command

I used the photoshop Command to Auto Align Layers as shown below

Use the Edit > Auto-Align Layers in Photoshop to correct for any camera movement between shots

Use the Edit > Auto-Align Layers in Photoshop to correct for any camera movement between shots

Then I selected the Cross. I used the Polygon Lasso Tool and then the quick mask to clean up the selection.

Select the Cross, then clean up the selection with the Quick Mask Tool

Select the Cross, then clean up the selection with the Quick Mask Tool

I arranged the layers so the brighter layer is on top. Then, I created a layer mask with the "Selection Revealed" from the "Layer Menu".

Screen Shot 2021-08-13 at 3.31.02 PM.png

I fine-tuned the final image by;

  • Applying a "Curves Layer" to fine-tune the exposure in the sky.
  • Using a "Dodge Layer" to accentuate the rays in the sky.
  • Cloning out unwanted power lines on a merged duplicate layer.
Photoshop Layers for final image

Photoshop Layers for final image

Final Processed Image

Final Processed Image

Read More
Charles Bush Charles Bush

Making and Processing a Black and White Image–Part II

Part II of a series on making and processing a black and white image.

St Eloi Church Theriot, Louisiana

St Eloi Church Theriot, Louisiana

Image Analysis

The next step in the process is to examine each image, and select a processing strategy. The first step is to view the histogram of each image. The best image will be where the information is as far to the right as possible without clipping the highlights. As shown in the figure below, the middle image shows clipping when the exposure is adjusted, but the next one to the right has a good histogram when the exposure slider is adjusted to reduce the exposure by one-half stops.

Bracketed Image Exposures

Bracketed Image Capture

Histogram of next to last image

Histogram of next to last image

I'm using Lightroom to do these checks and to make the initial cleanup adjustments. As you can see, the histogram is clipped neither in the shadows or the highlights. With a clipped image in both shadows and highlights due to too much contrast, I would have considered using HDR techniques or masking the sky and replacing it. I then checked the box for Chromatic Aberration in the Lens Correction Panel, and it removed some noticeable fringing in the image. Next, I checked the image for noise, and I added a bit of noise reduction and a small amount of sharpening. Finally, copying the adjustments to the second image in the series allows me to make a mask for a brighter cross in the final version.

The noise in the image's shadows was almost non-existent due to carefully selecting the correctly exposed image and the low ISO of 64 used for the shot. For noisy images, I would have used a third-party noise reduction application such as Topaz DeNoise AI.

My next step is to play with the adjustments and look for characteristics of the image that I can leverage in the final Black and White version. I also looked for problems for correction. Then, I noticed that by bumping up the dehaze value, I could accentuate the bright center of the image in the final version. At this point, I also saw light rays radiating from the illuminated area of the image. So again, I synchronized the settings to the brighter image I will use to brighten the cross.

Color image ready for black and white conversion

Color image ready for black and white conversion

Part III will cover converting the image to black and white.

Read More
Charles Bush Charles Bush

Making and Processing a Black and White Image–Part I

First in a series covering the making and processing of a black and white image.

St Eloi Church Theriot, Louisiana

St Eloi Church Theriot, Louisiana

Image Capture

Processing an excellent Black and White Image always begins with a good capture. I captured this image on a very foggy morning south of where I live in the swampland. I left home early in the morning when the weather was clear. Unfortunately, as I approached the bridge where I planned on photographing the Pelicans, a heavy fog set it. So I decided to photograph this church instead.

The sun was directly behind the church and was illuminating the fog. I visualized the scene as a black and white image with the church in silhouette, the cross brightly illuminated to emphasized the church as the subject. In addition, I wanted to highlight the triangular shape of the church.

I used my 19mm tilt-shift lens to ensure the church was level and straight and not tilted with straight vertical lines. I set the tripod up, leveled the camera and lens, and then used the shift feature of the lens to create the composition I wanted.

The lighting was very tricky, and I had plenty of time. Therefore I decided to bracket my exposures shooting five shots, each one-stop darker than the previous shot. I carefully focused the manual focus lens, and I fired off the five-shot bracket using a cable release to minimize camera shake.

Bracketed Image Capture

Bracketed Image Capture

Part II of the article will explore the files and deal with issues such as noise and contrast.

Read More
Charles Bush Charles Bush

Photo Workstation Upgrade

I recently switched from my 2015 iMac to a new MacBook Air with the M1 Chip. This article describes the reasoning and the process involved.

August 2021 Photo Workstation

August 2021 Workstation

I just made the upgrade from my 2015 27" iMac To an M1 MacBook Air. This process started when the Macbook Pro I've used for photo trips developed a problem with its' battery. As I was nearing the start of my Spring photo tours, I didn't have time to change out the battery, so I purchased a MacBook Air with the new Apple M1 chip. I bought the machine with a 1 TB SSD and its maximum of 16 GB of memory. The new computer not only handled the trip downloads and image editing well, but it also proved to be as fast or faster than the iMac I use for my photo editing at the office. However, the iMac is aging, and I decided to switch if everything I need is available on the new computer. I view this as a transitional upgrade, as I will update again when the more powerful desktop computer versions of the new architecture become available.

The first step is to list all the functions and applications you commonly use or would like to use with the computer. Then assign a criticality code for each of these. Then, the research begins on the compatibility of each application/function. In my case, I was coming from a machine running OSX Mojave, which still allowed 32-bit applications. However, the M1 is running Big Sur, and the 32-bit applications will not function. In addition, the M1 uses a different instruction set than the iMac with an Intel processor. However, Apple has provided an emulator called Rosetta, making the application run slower than those running natively.

Essential Applications and Functions:

  1. SoftRaid
  2. Lightroom
  3. Photoshop
  4. FileMaker Pro
  5. Imageprint
  6. Topaz AI Filters
  7. Nik Collection
  8. Wacom Tablet
  9. Dual Monitors
  10. Zerene Stacker
  11. Multiple Displays
  12. i1Display

All essential Applications and functions are acceptably supported. Although the MacBook Air M1 doesn't support two external displays, the second display is the 13-inch laptop screen. Additionally, the Nik Collection isn't supported as a filter in Photoshop and is only available stand-alone.

The next step is to diagram the current and proposed system and ensure the new system will support the required configuration. Then, by using an OWC Thunderbolt dock, I can obtain the necessary connectivity to match the iMac configuration.

M1 MacBook Air System Configuratoin

M1 MacBook Air System Configuratoin

After the research is complete, the tedious work of moving the data and doing any required updates begins. After updating, I'm leaving the iMac available for some time to make sure that nothing needed gets left behind.

I'm available for consulting for photo applications running on Macintosh Computers, don't hesitate to get in touch with me at charlie@charlesbushphoto.com

Read More
Charles Bush Charles Bush

Photographing the Swamp in Black and White

I've been photographing the swamps here in Louisiana since I moved back in December 2001. I've focused on photographing birds and cypress scenes in color. For several years I've been drawn to rendering swamp scenes in black and white rather than in color.

Lake Dauterive Cypress Backlit Mist

Lake Dauterive Cypress Backlit Mist

Introduction

I've been photographing the swamps here in Louisiana since I moved back in December 2001. I've focused on photographing birds and cypress scenes in color. For several years I've been drawn to rendering swamp scenes in black and white rather than in color. The images begin as color images converted into photoshop or Nik Silver Efex Pro to black and white. With this approach, I apply filters in software to similate the use of color filters on the camera lens to lighten or darken parts of the image. When in the field, I often set my camera to monochrome mode to simulate how the image will appear on the back of the camera's LCD. While the camera still produces a color raw image file, it helps visualize the photograph while in the field.

Early Morning Lake Dauterieve

Early Morning Lake Dauterieve

Composition

Composing a compelling Black and White image in the swamp is challenging. An effective black and white photos are as visually simple as possible. Without care, the tangle of Cypress trees, Spanish moss, and underbrush makes the image too busy. The careful attention to eliminating elements and getting to the essential is the key.

Foggy Morning Henderson Swamp

Foggy Morning Henderson Swamp

Without color, elements tend to merge. Careful attention to the tones of the foreground and background is essential to make the subject of the image stand out.

Cypress in Bright Morning Mist

Cypress in Bright Morning Mist

The best Cypress Tree images are of the trees in the water. I often like to photograph so that the reflection in the water is nearly are prominant as the tree itself.

Ghost Tree in the Fog–Lake Dauterieve

Ghost Tree in the Fog–Lake Dauterieve

Fog and Mist

Weather conditions in late November and December in Louisiana is conducive to thick fog. Fog obscures the background and makes high contrast scenes with darker tress against a bright background.

Foggy Swamp Scene–Lake Dauterieve

Foggy Swamp Scene–Lake Dauterieve

Mist also frequently occurs in the swamps and lakes during the winter in Louisiana. Typically this happens on frigid days where the air temperature is much colder than the water temperature. For color photography, this is excellent since the sun shining through the mist makes a golden glow. It is also great for black and white as it lends visual interest.

Cyprss Knees and Trunk–Misty Morning–Lake Dauterieve

Cyprss Knees and Trunk–Misty Morning–Lake Dauterieve

Manmade Structures in the Swamp

In addition to the Cypress Scenes, there are many buildings and structures to photograph in black and white.

I-10 Atchafalaya Bridge at the Butte La Rose Boat Landing

I-10 Atchafalaya Bridge at the Butte La Rose Boat Landing

St Eloi Church–Theriot, Louisiana

St Eloi Church–Theriot, Louisiana

Clicking the images will link to a webpage where you may purchase them. Or click here for my print webpage. Additionally, I created most of these images on one of my fall photo tours. Click here for more details and to sign up for one of the tours.

Read More
Photography Charles Bush Photography Charles Bush

Boats for Photographing in the Swamp

Photographing nature in Southern Louisiana often means shooting from a boat. Previously, I discussed techniques for shooting in a boat. For this post, I'm talking about what type of boat to use in the swamp.

Aluminum Hulled Boat Used on my Photo Tours

Aluminum Hulled Boat Used on my Photo Tours

Photographing nature in Southern Louisiana often means shooting from a boat. Previously, I discussed techniques for shooting in a boat. For this post, I'm talking about what type of boat to use in the swamp. Considerations include;

  1. The ability to get into areas with shallow water
  2. How quiet the boat is, mainly when photographing wildlife
  3. What your point of view is, you want to be low for some subjects, high for others
  4. The stability of the boat you don't want to fall in
  5. Your ability to Photograph without the boat or anyone in the boat obscuring the view
  6. You want to be able to transport the boat to the shooting location easily
  7. The ability to operate the boat while you also photograph with the camera?
  8. Cost

I include the following types of boats in this post:

  1. Skiffs
  2. Mud Boats
  3. Airboats
  4. Canoes
  5. Kayaks
  6. Perogues

Motor Powered Boats

Skiffs

I've been working with the folks at The Atchafalaya Experience since 2003. They use aluminum-hulled boats with outboard motors and a center console for steering and control. These boats get us into fairly tight places with several feet of water. They sit moderately low on the water so you can get a relatively low point of view, often ideal for landscapes and suitable for birds wading in the water. They are rugged and extremely safe. They are stable enough for you to stand so you can achieve a higher point of view for birds perched in trees or nesting on a treetop. They are relatively quiet, allowing reasonably close access to birds without stressing them. They can quickly cover a large area allowing you to shoot at multiple locations.

Ideal when multiple photographers are photographing and with people with limited experience operating a smaller boat that requires paddling.

Downsides include obscured vision with multiple people in the boat, vibration from the motor, difficulty transporting and launching the boat, and cases where you want to have a point of view at water level. This type of boat is best when the captain is not photographing.

Mud Boats

Gator Tail Mud Boat on the way to Cow Island Lake

Gator Tail Mud Boat on the way to Cow Island Lake

Mud boats are similar to skiffs, except that they have an outboard air-cooled engine allowing them to traverse areas of little or no water. As the best swampy areas to photograph are in shallow waters, this can prove a significant advantage. My friends at Atchafalaya Experience used this type of boat for several years. However, they proved to be unreliable, and for wildlife photography, their propensity to backfire when restarting the engine proved to be problematic. These boats are as stable as the skiffs with the same issues with transporting and launching. As with the skiff, you need a dedicated captain, who is not photographing.

Airboats

A flat bottomed boat fitted with a large automotive engine and an aircraft propeller. It does not require water and can go over swampy areas. Very noisy and vibration prone. Hearing protection usually needed when in use. Wildlife doesn't tolerate the noise, and the vibrations make photography very difficult. The point of view is high, and there is little ability to move about in the boat when in use. The only practical function is to drop off photographers in remote locations not reachable in any other way. A skilled, dedicated captain is required.

Human Powered Boats

Perogues

The Perogue is the classic cajun boat used for fishing and trapping in the swamp. Originally a dugout made from a cypress tree, the most common form of it is now handmade from 1/4 inch marine or exterior plywood. Classically the boat is push polled with the person standing in the Perogue, but many people sit and paddle with a single-headed paddle. Flat bottomed, it has a very shallow draft and can operate in very shallow water. It is typically less stable than a canoe, but more stable than a Kayak. I've never photographed from a Perogue; however, many years ago, my wife and I paddled in Bayou Dularge south of Houma in one built by her Grandfather. Unfortunately, it had developed a leak, and the two of us slowly sank. I think of this when I consider photographing from one. A Perogue may be a good option for swamp photography. Perogues are inexpensive if you're able to construct it yourself, stable, quiet in the water, reasonably simple to transport, and low in the water. Like all human-powered boats, you're not able to move from one area to the next rapidly, so you need to pick your location carefully. Also, being small, you're limited to shallow protected waters; you don't want to be out in rough weather.

Kayaks

Kayaks are the modern replacement for the Perogue. Lighter and available at low cost, they don't require construction. They ride lower in the water than the Perogue so they may offer a better point of view. I haven't photographed from one, but know many who have. They represent an easy, inexpensive way to get on the water. Again, you need to pick your location, you can't quickly paddle across and a large body of water. They are quiet, easy to transport, and you can launch nearly anywhere. Typically they are paddled with a double-headed paddle, but foot-powered kayaks are available, which would leave your hands free to photograph, and you are less likely to splash water on the equipment.

Canoes

A Canoe may also be an excellent way to photograph on the water. Heavier than either the Perogue or the Kayak, they are more stable, but they are harder to transport or launch. Like the Perogue and Kayak, they are quiet and have a shallow draft. Typically they are paddled with a single-headed paddle, a disadvantage over the Kayak as it is more likely to splash water on equipment. Like the other human-powered boats, moving quickly to another location is not possible.

I've relied on motor-powered boats for the 19 years I've been doing photography in Louisiana. Over the next year, I hope to explore one or more of the human-powered alternatives to allow me to get out more on the water.

Read More
IR Photography Charles Bush IR Photography Charles Bush

Infrared Post Processing

Unlike photographing with visable light, creating a realistic looking IR image requires a significant amount of post processing.

The following outlines the steps I've taken editing a typical image from my D800 camera with the 665nm IR conversion.

Processed IR Image

Processed IR Image

My IR Post Processing Workflow

Unlike photographing with visable light, creating a realistic looking IR image requires a significant amount of post processing.

The following outlines the steps I've taken editing a typical image from my D800 camera with the 665nm IR conversion.

When the image is first imported into Lightroom it has a very red cast. So the first task is to deal with that.

Image as imported into lightroom

Image as imported into lightroom

Lightroom does not apply the custom white balance created in the camera and does not have the range to neutralize the image. For Nikon Cameras the best option is to use Nikon's older Capture NX2 raw conversion software. While the newer NXD will do the job, NX2 allows you to select the whole image a set the grey point averaging the whole image, while NXD will only allow you to select single points. With NXD you will need to experiment with multiple selections until you get the best result.

Setting the Grey Point

Setting the Grey Point

In Capture NX2 select the grey point option, they the marque tool and then drag the eye dropper from the top right to the bottom left.

Image with the Grey Point set

Image with the Grey Point set

This produces an image with a grey sky and trees with light blue leaves. I like to set the white and black points while working with the raw files and then save the image as a TIF file. I prefer to have white leaves and a dark blue sky so now I bring the image into photoshop and do what's called a channel swap with the chanel mixer. Selecting the red channel and bringing the red levels to 0 and the blue levels to 100 and then selecting the blue channel and setting the blue levels to 0 and the red levels to 100. See the illustrations below.

Making the red channel blue

Making the red channel blue

Making the Blue Channel Red

Making the Blue Channel Red

This produces an image that is closer to the goal but not quite there yet. I then create a hue ssturation layer. Fine tune the colers using the Master selection, desaturate both the yellow and red channels to zero. Leaving the colors nearly where I want them.

Adjusting the Master Hue in the Hue Saturation Layer

Adjusting the Master Hue in the Hue Saturation Layer

Desaturating the yellow channel

Desaturating the yellow channel

Desaturating the red channel

Desaturating the red channel

I like the final result to have just a hint of color. I use the Google nik plug-in silver effect pro to create a black and white version of the image as a layer in photoshop and then adjust the opacity of that layer to let just the right amount of color from the underlying image.

Black and white image using Silver Effects Pro

Black and white image using Silver Effects Pro

Setting the opacity of the Silver Effects Pro layer to fine tune the saturation of the image

Setting the opacity of the Silver Effects Pro layer to fine tune the saturation of the image

While this more complex than editing a visible light image, buy creating an action for the channel swamp the process can be done fairly quickly.

In many cases I prefer the black and white version to the color one and all that needs to be done is to leave the opacity of the Siver Effects Pro layer to 100%

Read More
Charles Bush Charles Bush

Infrared Photography to Extend Shooting Window

I've been frustrated for some time about having a very short window of good light early and late in the day. The middle of the day has always been a challange. Fortunately there's one form of photography that is best in the middle of the day with bright light, Infrared (IR) photography.


Oak Tree–Lake Martin Visitor's Center

Infrared Photography (IR)

Why Infrared–Extending the shooting window

I've been frustrated for some time about having a very short window of good light early and late in the day. The middle of the day has always been a challange. Fortunately there's one form of photography that is best in the middle of the day with bright light, Infrared (IR) photography.

Basically IR is a lower frequency radiation than we can see (red is the lowest we see so it is a wavelengh longer than red). the image is brighter for those objects emitting the most of this longer wavelength radiation which tends to be things that are warmer. IR images often taken on a dreamy other worldly look.

How to Shoot IR

There are two primary methods of capturing IR images, using a filter over the lens of a normal camera, or having a camera converted to capture IR and not visable light. Our normal sensors have a filter over them to block most of the IR frequencies, so the filter doesn't work very well, involving very long shutter speeds, so for most of us that is not a good option.

I experimented with that many years ago with a Coolpix 950 2.1 megapixel camera, and while it did a good job of capturing IR images, it required a tripod and the resolution was very low so prints were not really pracitical.

Bayou Scene Taken with Coolpix 950

The most practical method is to have your camera converted by one of several companies specializing in this process. They remove the filter over your sensor and replace it with one that blocks visible light and passes the IR frequencies.

Camera Conversion

I got an older D800 camera converted by Kolarivision. There are several wavelength options from displaying only black and white images to allowing a bit of color through. The filter I chose was a 665nm filter which they call an enhanced color filter. With a bit of post processing, which I will discuss in a later post, you can achieve a look with dark blue sky and white leaves. I also got their AR coating which helps reduce hot spots visiable with many lenses. Kolarvision did a very good job with the conversion and turned the camera around very quickly.

Another well respected company doing conversions is life pixel. While I've never used them, I know several people who have who were very pleased.

There are people on the web who have converted their cameras themselves, I would recommend against attempting this as it is a complex process prone to errors and with the risk of trapping dust between the filter and the sensor.

Shooting with the converted camera

While shooting with the camera in color mode you see the image with a deep red tint. This tint with most cameras can be corrected with a custom white balance. Unfortunately it took a bit of effort to make that work with my D800. The image was out of range for the camera to make the white balance, but I was able to work around this by shooting a light blue card and then applying the maximum amount of correction in the white balance fine tuning control in the custom settings menu. Another option would be to set the camera to monocrome, shoot in raw and post process using the resulting color image.

Another consideration is that the focus point is different from visible light and while the conversion company makes a correction for this, not all focal lengths of lenses work the same. The best approach is to use live view to focus where both the contrast detect autofocus and manual focusing will give accurate results.

Next Steps

I'll discuss Post Processing in another post. Suffice to say it's a bit of effort to get good results.

Oak Jefferson Island

Verdict

I'm really glad I had the D800 converted and I'm pleased with the results that can be achieved. It does in fact extend the shooting window.

IR Pano–Houma, La

Read More
Charles Bush Charles Bush

Playing with Photoshop

Playing with Photoshop, converting a large panoramic image into a circular composition.

Playing with Photoshop Polar Coordinates

Today I played with a technique I learned on Lynda.com to turn a panoramic image into a circular composition using the distort polar coordinates filter. The original panoramic image looked like this.

Original Panoramic Image Taken in the Atchafalaya Basin

Not a realistic representation of what I saw, but at least it was a fun project.

Read More